WangEmu Disk Factory
The disk factory is used to create new disks, or to inspect and optionally modify existing disks. The disk factory operates in one of two modes, depending on which way it is invoked, both of which are located in the main menu bar Disk item:
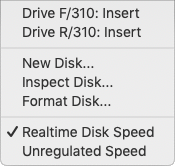
These functions are also accessible from the disk drive icons shown on the lower left hand corner of the window. While holding down the Cmd key, left click on an occupied drive to invoke the disk inspector dialog.
![]()
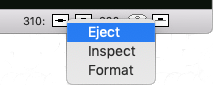
Another way to invoke the disk factory is by invoking a context menu on the disk drive icon. An empty drive has a different context menu than an occupied drive. While holding down the Cmd key, right click on a drive icon.
![]()
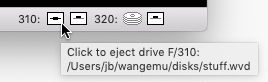
This is not specific to the disk factory, but while discussing this bit of the interface, it is worth noting that hovering the mouse pointer over a disk drive will produce a balloon window stating either how to insert a disk (if the drive is empty), or describing which disk is currently in the drive, if occupied.
New Disk
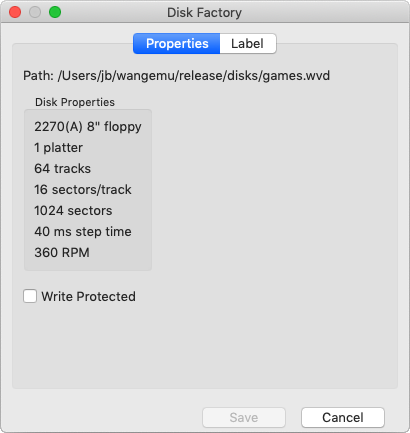
When invoked in this mode, the dialog looks like this:

Although the emulator can accept many formats of disks with differing number of platters, sectors per platter, and timing profile, the dialog displays a number of common real configurations, plus a couple to fill the gaps (for instance, I don't believe a DS-224 was ever made, but it is about the largest possible disk in Wang BASIC-2).
The top left "Disk Type" buttons select which of the disk configurations to make. The physical size (5.25" or 8") is irrelevant to the emulator, but it is represents how the actual 5.25" and 8" Wang floppy disks were configured.
To the right are the "Disk Properties". For a chosen disk type, this area shows exactly what that means in terms of the number of sectors on the disk, the number of sectors per track, the track to track stepping time, and the disk speed. The emulator can be configured to ignore the timing related parameters and to just run as if the disk drive was infinitely fast, but the number of sectors per disk is always important.
Beneath these areas exists a write protect checkbox. By checking the box, it won't be possible for the emulator to modify the disk state, akin to the write protect tab on a floppy disk.
Most likely it is useful to supply a label for the disk (described below) before saving the new disk image to the real file system.
After setting everything up, click on "Save As" to specify where to put the disk and what name it should have.
Inspect Disk
The disk inspection mode can be used to view properties of the disk, such as size, its label, and its write protection status. It looks like this:
It looks very much like the New Disk mode, with a few changes.
First, there is now a "path" description. It says where the virtual disk image is located.
Second, there is no "Disk Type" region. Instead, the Disk Properties region is sufficient to describe the disk's attributes. These attributes can't be changed after the disk has been made.
What can be changed are the disks write protection status and the disk label. The changes can only be saved back to the same disk image; there is no way to save it to a different filename.
Disk Label
To view or modify the disk label from either "New Disk" or "Inspect Disk" modes, select the second tab, and you will see something like this:
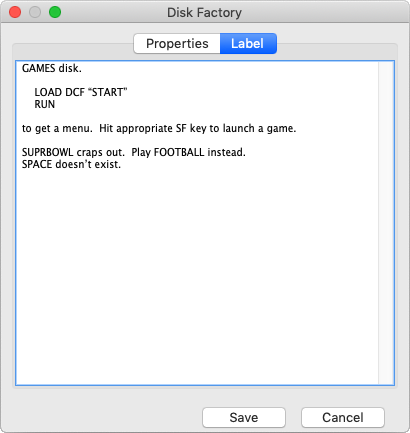
This tab lets you view the label, but you are also free to modify it, or to copy a selection from it to the system clipboard.
Format Disk
An existing virtual disk image can be formatted quickly by using this menu option. It simply writes all sectors of the disk to 00 bytes.